The importance of machine settings in Laser Cutting
Laser cutting machines are versatile tools that can produce clean cuts in a wide range of materials, including steel, aluminum, plastic and more. As the cutting head moves over the surface, the focused beam melts the material and a stream of gas blows it away.
Making fast, clean cuts with a laser machine is not an easy task. The machine operator has to select the best values for each setting:


The machine's settings not only influence the quality of the cut, but also the costs of running the machine.
The process of finding good settings wastes time and resources, and needs to be repeated when something on the production line changes, for example, when a new alloy or different thickness is used.
All of it adds up to large costs and a larger carbon footprint.
Find better settings faster with the help of AI
GaussML has developed Optimyzer, an AI-assistant that helps manufacturing companies increase their productivity. It suggests settings that you can try on your machine, and then report back the results. With this information, Optimyzer quickly becomes an expert in your machine, and leads you to better settings.
In this example, we want to find settings for a laser cutting machine, such that it makes the cut as quickly as possible, while keeping a high quality (that means, having no noticeable burr). The machine settings are:
- Laser power, from 30% to 80%
- Laser focus, from 0 mm to 0.5 mm
- Cutting speed, from 50 mm/s to 150 mm/s
- Gas pressure, from 6 bar to 14 bar
- Nozzle distance, from 0.1 mm to 0.8 mm
We built a simulation of a laser cutting machine, based on experimental data, to demonstrate our solution.
We compare the results of our solution against Design of Experiments (DoE), a common approach for optimizing systems with a few parameters. We start the optimization by considering the mid-point of the settings, that is, where all settings are halfway between their minimum and maximum values. This is a good rule of thumb.
Setting up Optimyzer for Laser Cutting
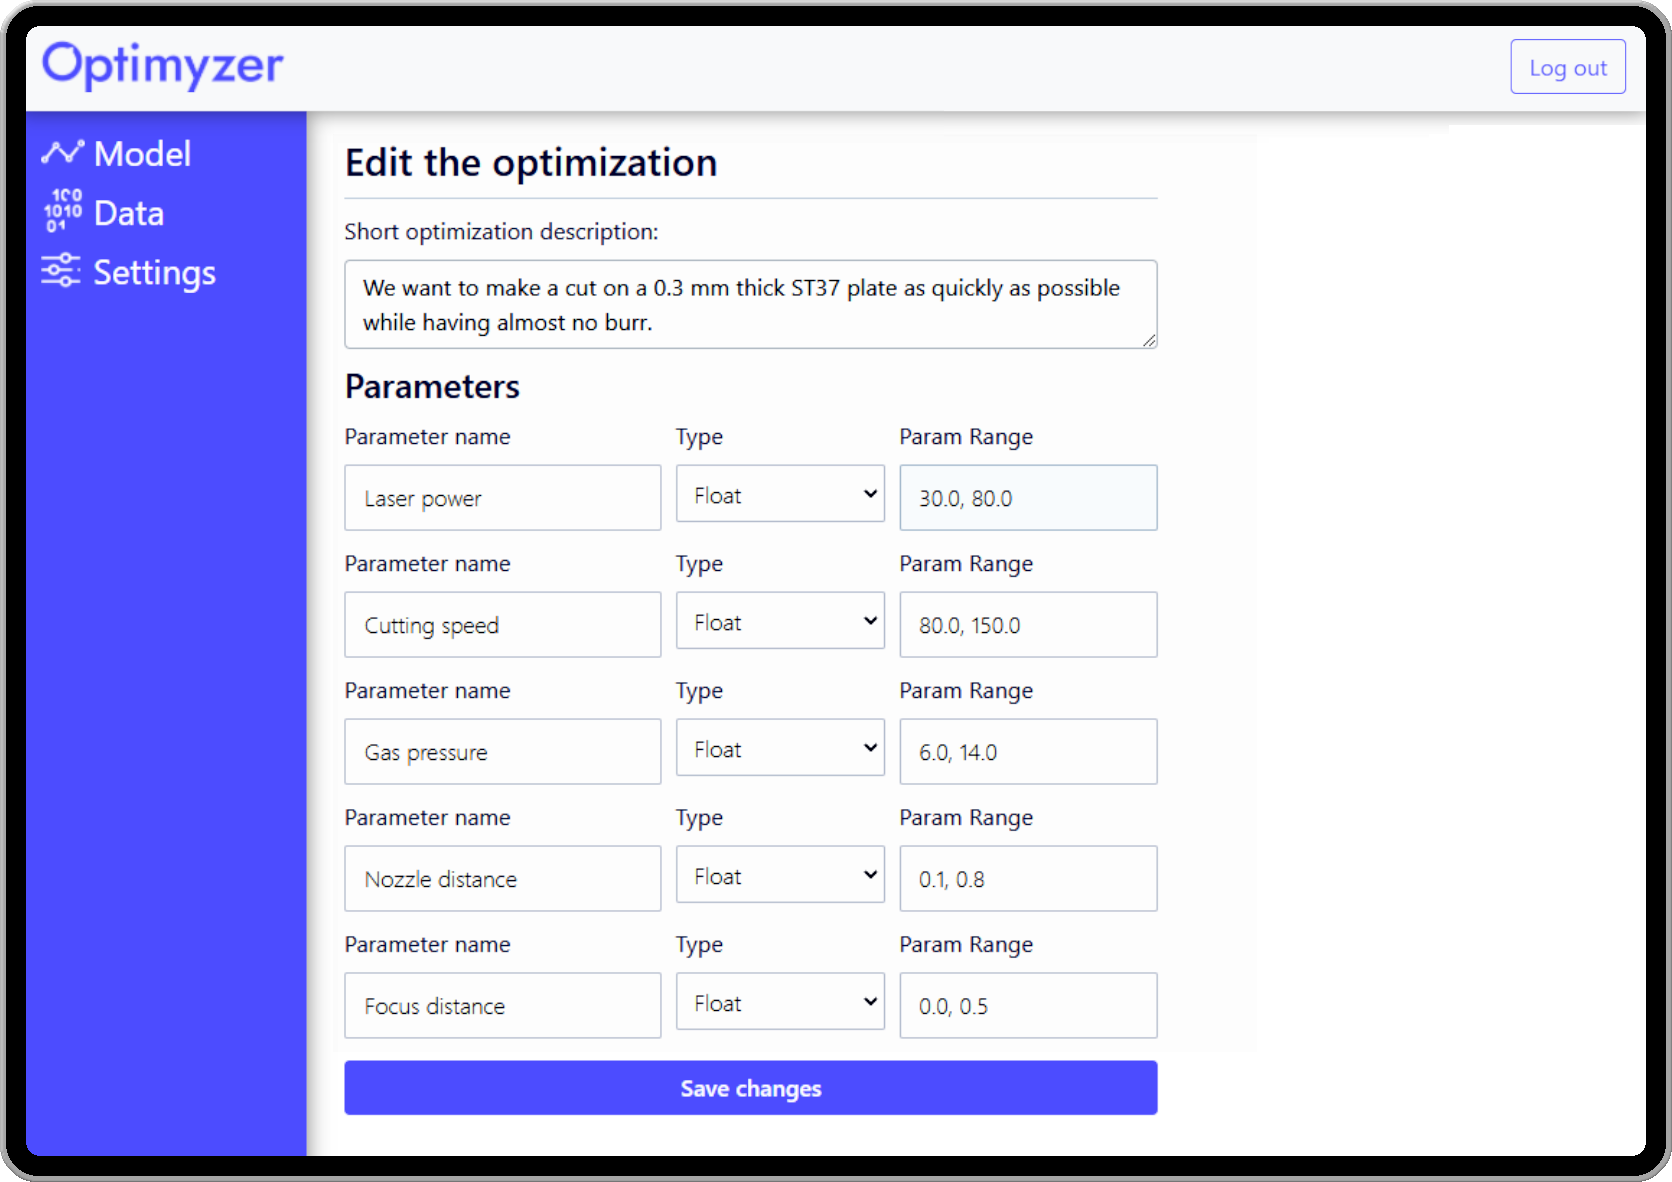
Setting up an optimization with our solution is very easy. You provide a short description of the machine that you want to optimize, which settings it has, how you will measure their performance, and what you would like to improve.
Optimyzer is interfaced with the simulation, so the operator can send the suggested settings to the machine with a single click. Depending on the connector of your machine, it is also possible to have it talk directly to Optimyzer.
After cutting a piece with the suggested settings and inspecting the cut, the results are ready to be reported back to Optimyzer. In this example, the results are filled out automatically once the simulation is finished. In your production line, the results may be filled out by your quality assurance personnel, or using the output of your automated inspection system.
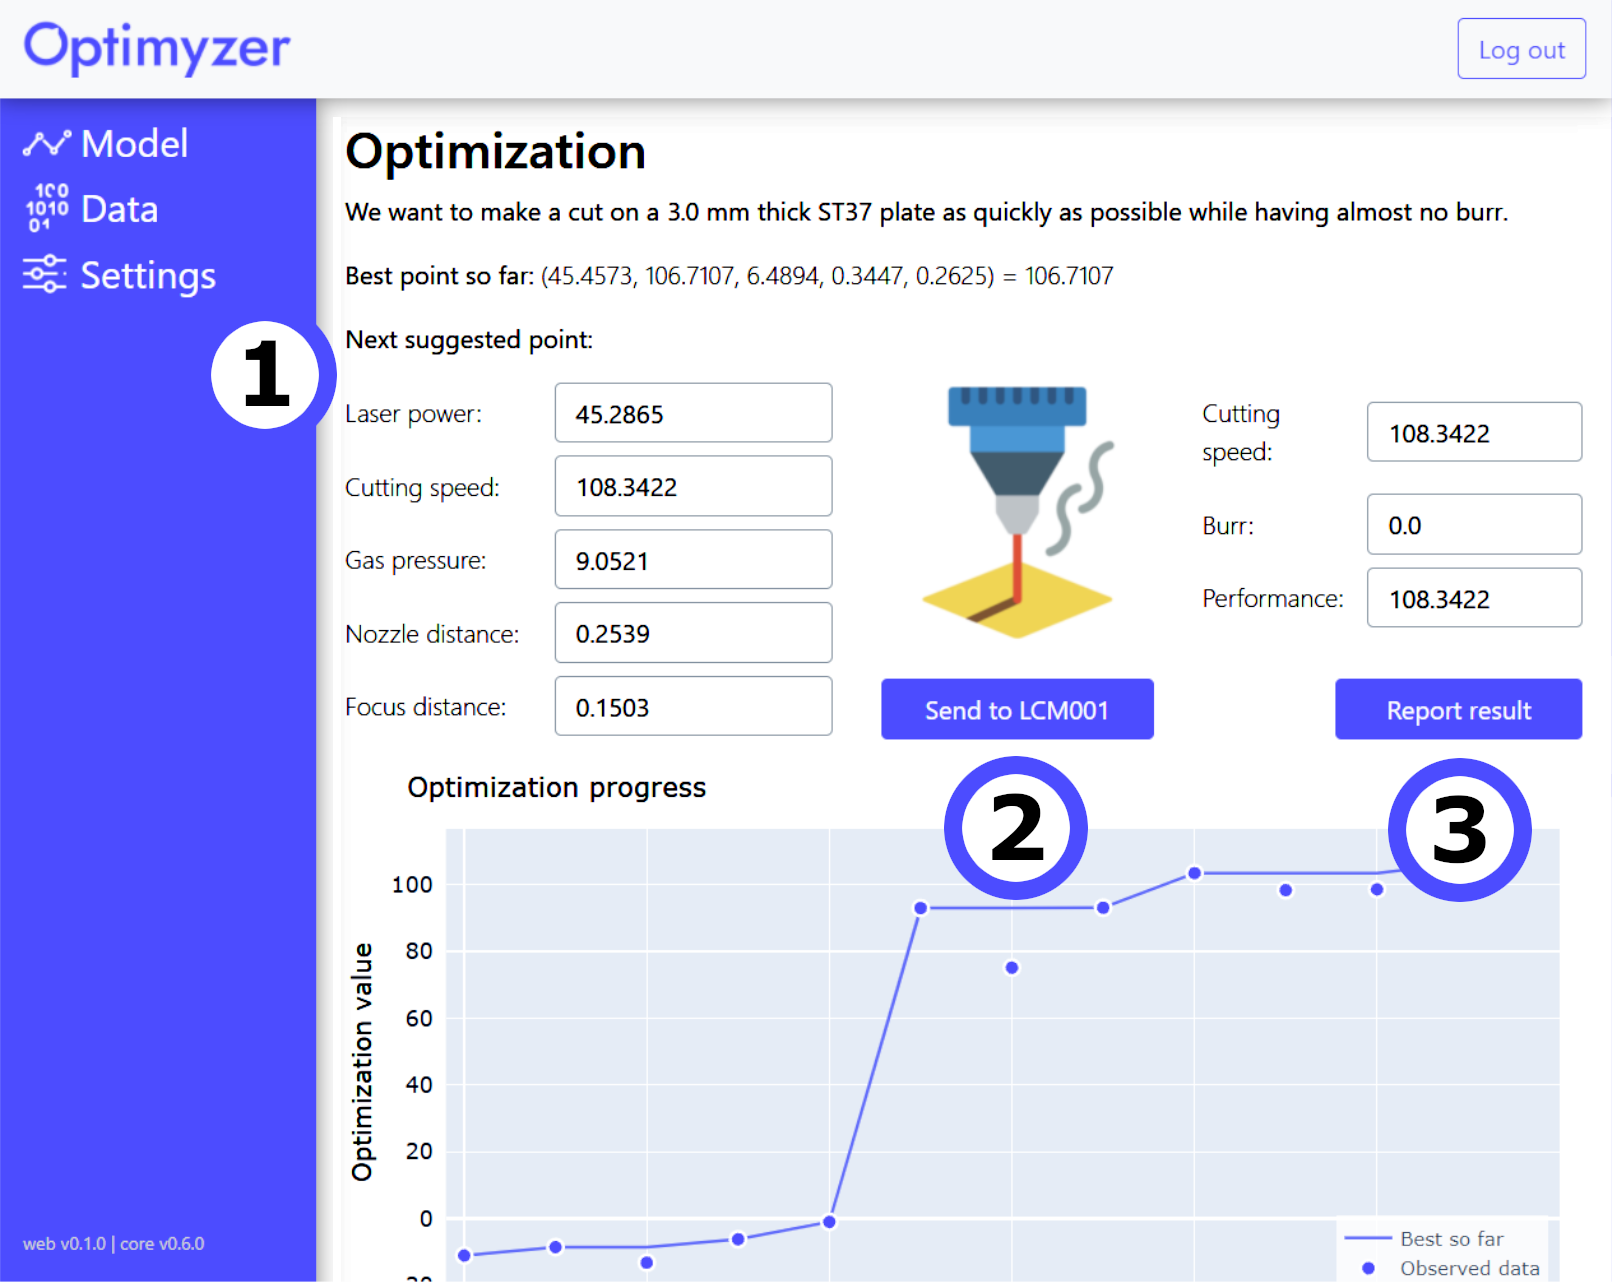
As easy as 1, 2, 3: (1) review the suggested settings, (2) try the settings on your machine, (3) report back the results
Optimyzer finds better results faster
After setting up the optimization in our solution, you can immediately start using its suggestions. We jump-started our experiments by testing the mid-point and then followed the suggestions from the AI.
Optimyzer found settings that result in a clean cut with a cutting speed of 118 mm/s after 12 experiments.
Compared to DoE, Optimyzer found almost 20% better results and required 30% fewer experiments.
For a thorough comparison between Optimyzer and DoE, we simulated 300 optimizations of laser-cutting materials with different properties, like width and melting point. For each material, we scaled the results to the best result of DoE. That means, the curve for DoE always ends at 100%. Below you see the median and 25/75 quantiles of the results.
Optimyzer surpassed the best result of DoE using half as many experiments in almost all cases. With 30% fewer experiments (15 instead of 22), Optimyzer finds almost 15% better results, on average.
Knowledge Transfer makes Optimyzer even more efficient
The results shown above demonstrate the power of intelligently exploring the optimization space. DoE wastes experiments by trying settings that will clearly produce bad results. Optimyzer quickly focuses on the best settings to explore, after seeing just a few results for that particular optimization.
In many use-cases, the best machine settings depend on environment parameters. These can be temperature, humidity, pressure, etc. In our example, the best settings depend on the material that we want to cut. Thicker steel sheets require different settings than thinner ones.
For the results shown above, each optimization was run as an independent optimization. This is a wasteful approach, however, because there's a lot to be learned about the machine's behavior by looking at the experience from previous optimizations. Optimyzer is able to transfer the knowledge from previous optimizations to complete the next optimization even faster. Imagine that you already know the best settings for cutting steel sheets of 3 mm, 4.5 mm and 6 mm. If you now want to cut a sheet of 5 mm, you can make an educated guess about what the best settings might be. Optimyzer can do that too!
When transferring knowledge between optimizations, Optimyzer can find better settings than DoE up to 7 times faster! With 70% fewer experiments (6 instead of 22), Optimyzer with Knowledge Transfer finds 10% better results than DoE, on average.
Find out how to increase the efficiency of your production line today.
Contact us